The long and winding Kilopixel road
May 5, 2023
A few years ago I had an idea to build a large, inefficient display with a web interface that anyone could interact with. I've noticed Danny Rozin's unconvenional mirrors over the years and then saw a 24 frames per hour movie player that got me thinking about a laborious display that could slowly assemble an image.
This led me to the idea of a 40x25 pixel grid of pixels, turned one by one by a motor on a gantry. A really, really inefficient way to generate an image. Conveniently, 40x25 = 1,000 pixels, leading to the name Kilopixel and the six-letter domain name kilopx.com. How do you back down from that? That's the best domain name I've ever owned.
So I got to work. This project has everything: a web app, a physical controller, a custom CNC build, generating and controlling gcode, tons of fabrication, 3d modeling, 3d printing, material sourcing... so much to get lost in. And honestly, I've been tinkering with it for years and been stuck a number of times. Now - in May 2023, after 4 years of stopping and starting, I've completed a prototype, learned so much, and am still far from finished.
It's time to bring you on board
But I've picked it up again. And sharing is one of my favorite parts of making, so I'm documenting the rest until I have a proper first working product. This post is meant to tell some history, show the evolution, and drop you into the story. You can also follow kilopx_com on Instagram.

First sketches
My first idea was to use a wooden gantry that would ride on some sort of track. Since I'm most comfortable working with wood, it's my default prototyping medium. However, I quickly pivoted to extruded aluminum and the excellent hardware kits from Openbuilds that include pulleys, gantry parts, extruded aluminum, and timing belts. It's very similar to most 3D printers, and connects very easily with stepper motors. This allowed me to build a gantry with X and Y, essentially a wall-mounted plotter.
1,000 of anything is expensive
Picking pixels has been a real pain. I've tried ping pong balls, styrofoam balls, bounce balls, wooden balls, 3d printed balls, golf balls, foam balls...anything approximately spherical and about 1-1.5in in diameter. The problems I found were largely cost (even a $0.50 ball is $500 of balls), weight (again, 1,000 of these things), and availability. For a long time I thought ping pong balls were my best bet, so I purchased a few hundred of them, 3d printed painting jigs, and spray painted them. I then used a hot nail to melt two opposite holes on each ball so they could be strung up on the display.
![]()
Ping pong balls are basically pop cans
You can stand on a pop can, as long as it's not open. Turns out, ping pong balls are the same way. They're strong and robust, until you melt two holes in them. Then they can be deformed, which is fatal to any spray paint you've put on them. And not only are they fragile, but the cheap ones are inconsistently sized, and a half millimeter here and there adds up when you have a row of 40 balls.
![]()
3D modeling + printing
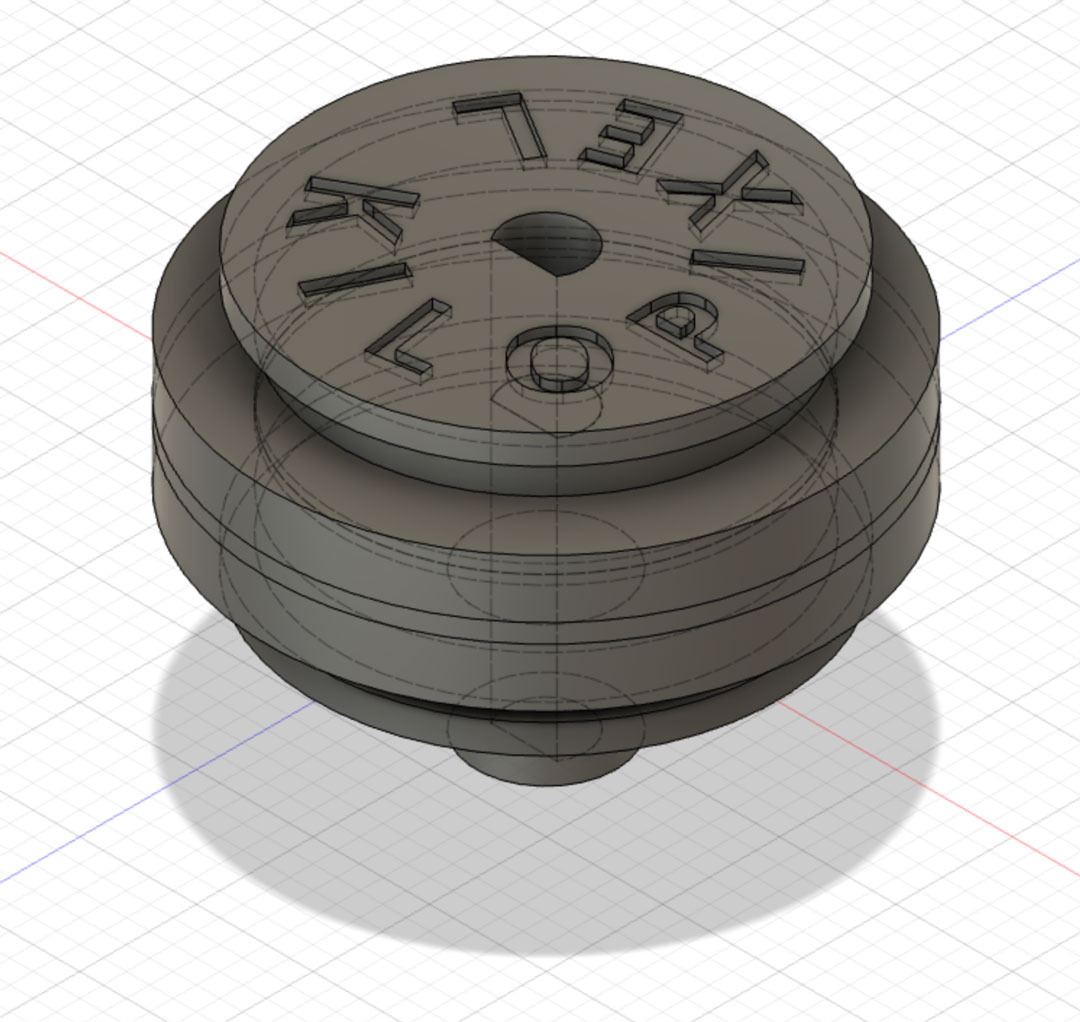
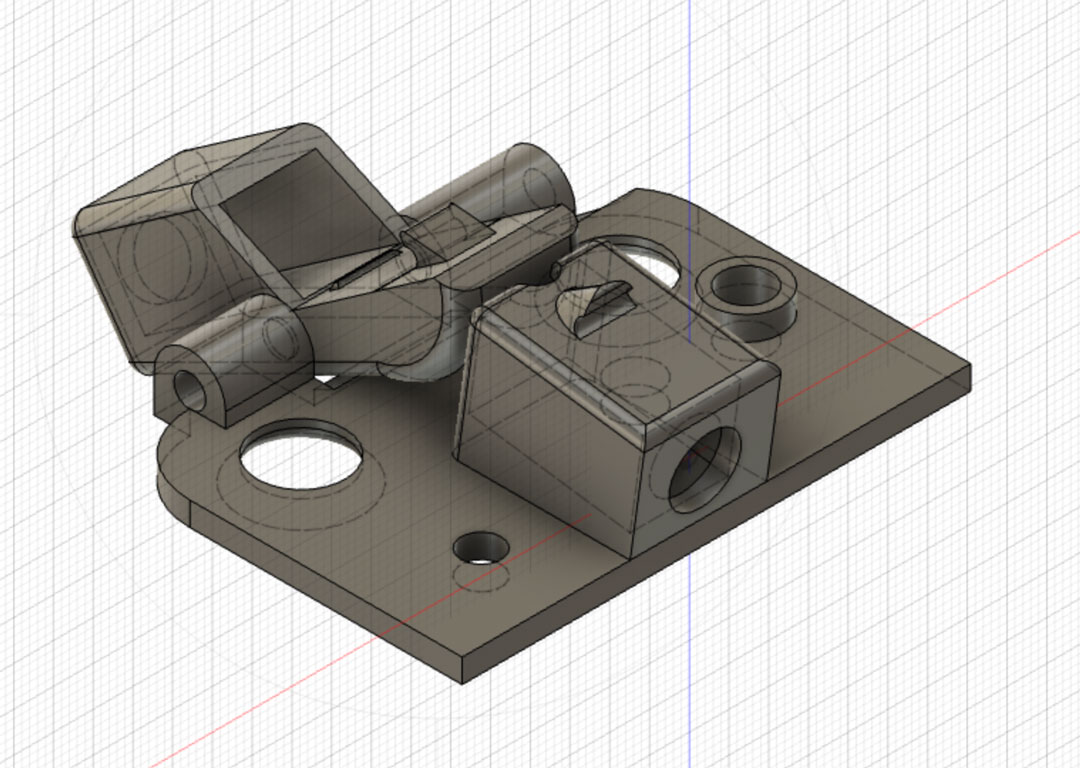
I had the idea to use a small, slow motor to rotate a LEGO wheel against the ping pong ball. I'd monitor the reflectivity to know if it was showing black or white, and stop once the pixel was rotated properly. To accomplish this, I had to model and print a custom hub for the LEGO wheel, a mechanism to move the wheel in and out of contact of the ping pong ball, and some way to connect it to the gantry. I had an idea to use a solenoid to push the motor to the ball, and an elastic band to pull it back, but this proved unreliable and underpowered.
Some real progress with the CNC
I have quite a bit of experience with my Inventables X-Carve so I was familiar with the basics of using gcode to control a CNC machine. I also knew the X-Carve is basically an Arduino, so I managed to find a decent CNC controller board that is used for CNC mills and laser cutters. This allowed me to control one stepper motor for the X axis, one for the Y axis, and a spindle/laser power source to run some kind of pixel actuator once I'd arrived at a given pixel.
I wrote a Python script to query an API for the next pixel, generate the gcode to move the gantry to that pixel, and engage the actuator to eventually rotate the ping pong ball from the white side to the black side.
A new tech stack for the web app
Thanks to a (now abandoned?) package by Beyond Code I decided to port the web app to Laravel with a Vue 3 frontend. I have it mostly complete, with a few preset modes as well as a default free draw option.
Lessons learned and what's next
I've learned so much in general (nodejs, websockets, python, gcode, stepper motors, CNC controllers, power supplies, extrusion hardware, 3D modeling, Vue) and that's been very satisfying. I've ruled out a lot of ball options and I'm trying foam nerf balls next. They're smaller - 7/8" diameter - but seem to take paint well, will thread on a wire well, and won't rotate when neighboring balls rotate. I'm also switching to a servo instead of a solenoid to push the motor against the ball.
The next set of challenges: making the servo work, controlling the motor with python and the Raspberry Pi's GPIO pins, and adding a phototransistor to detect whether the pixel is in the right spot or not. We'll see how these foam balls work out.
Popular Posts
- Pairing with Strangers (the Pair-amid Scheme)
- Mapping a Hyper key on MacOS with Karabiner Elements (the easy way)
- Defragment your PHPUnit tests
- A manifesto on shower temperature control
Recent Posts
- A photo a day for 30 days
- Building howtall.is
- The Art of Pairing with Strangers - Over Engineered Podcast
- Just how old is a 45 year old soup (and would you eat it)
- Growing Into a Leadership Role, and Pairing With Strangers - The Business of Laravel Podcast