Building an heirloom custom cribbage board
January 23, 2023
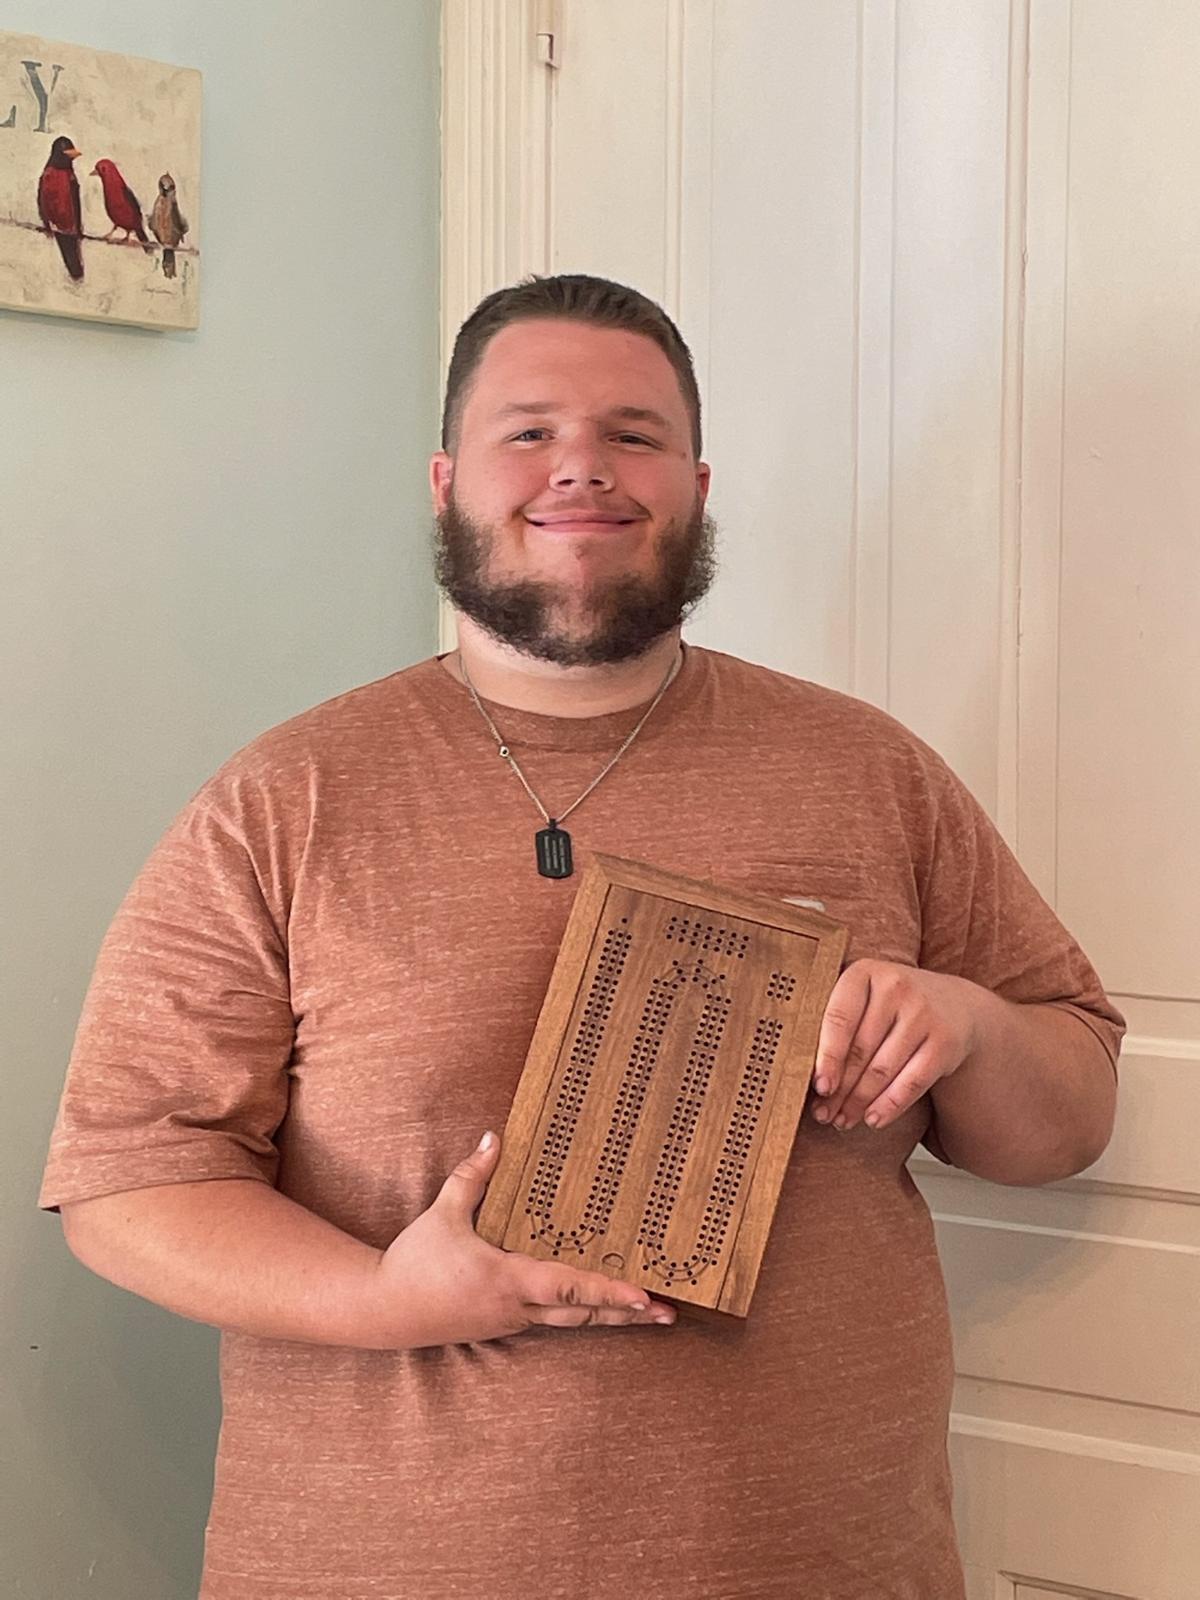
My nephew was graduating from high school and my sister in law asked me if I could recreate a sentimental cribbage board for him. She couldn't find anything quite like it, so a custom build was necessary. I love cribbage and I needed an excuse to get into the shop, so I said yes!
Reference materials
I never held the original cribbage board in my hands - just saw it in photos with a ruler for reference. I attempted to find similar cribbage boards, hopefully even a CNC template I could use, but came up empty. I couldn't find anything that was just like it.
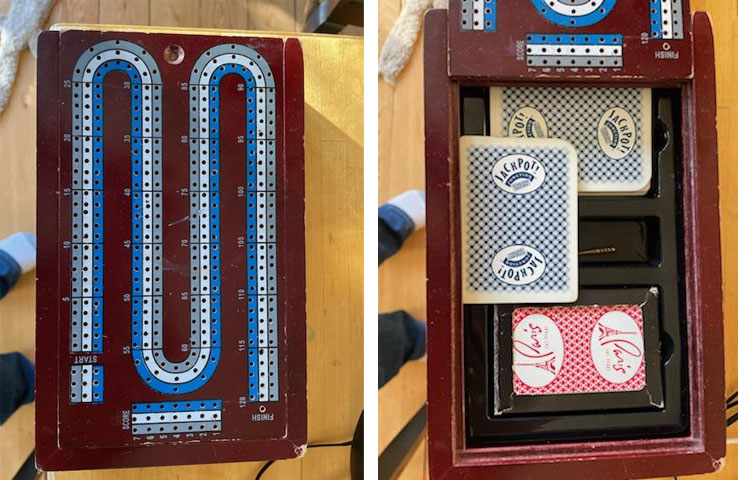
I used the reference photos, relative size of cards to other dimensions, and photos including a ruler to create an approximate replica of the overall shape. I then had to design the pegs and track for my CNC.
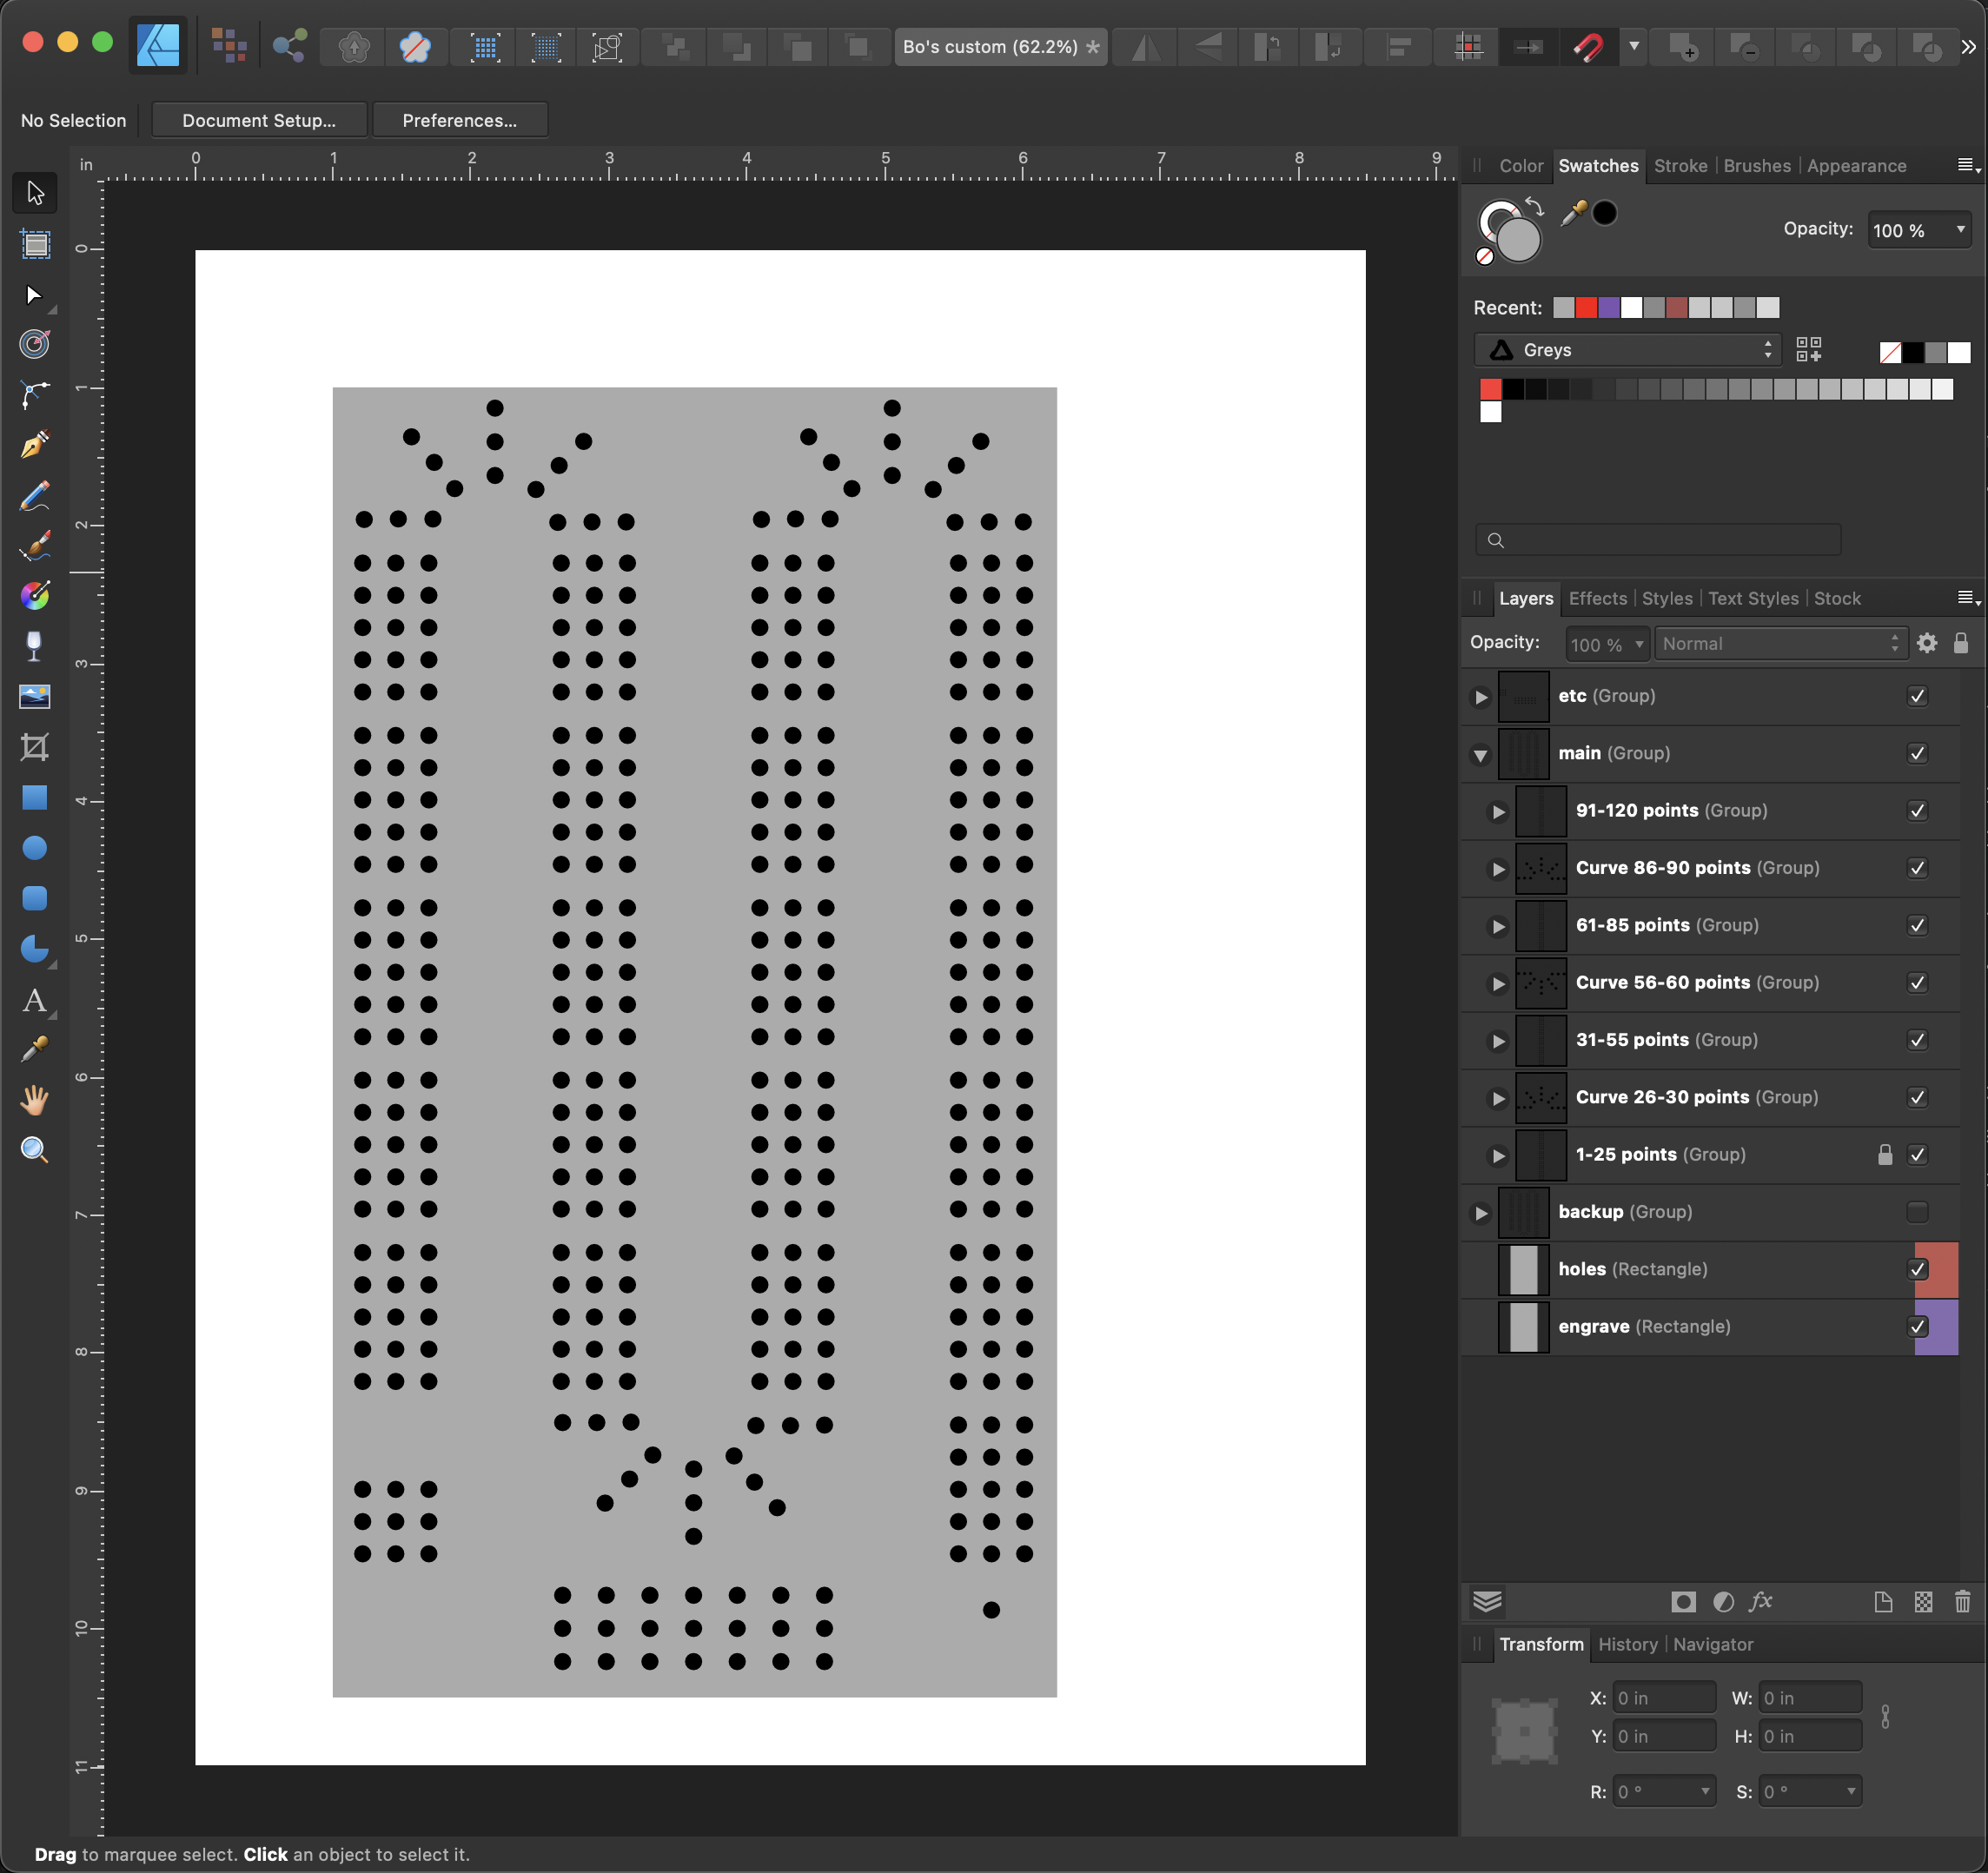
Recreating the hole pattern as a vector
The original was painted with a three-color painted (or screen printed) track. I debated trying to paint it with vinyl stickers to mask it off, but in my home shop, I didn't think I could pull that off to my standards. I decided to design an etched track and experimented with different depths and settings to see what would be the correct proportions. I drew up the design in Affinity Designer, tinkered with it for days, ran test cuts, and ultimately exported a final SVG and imported it into my CNC software, Inventables Easel.
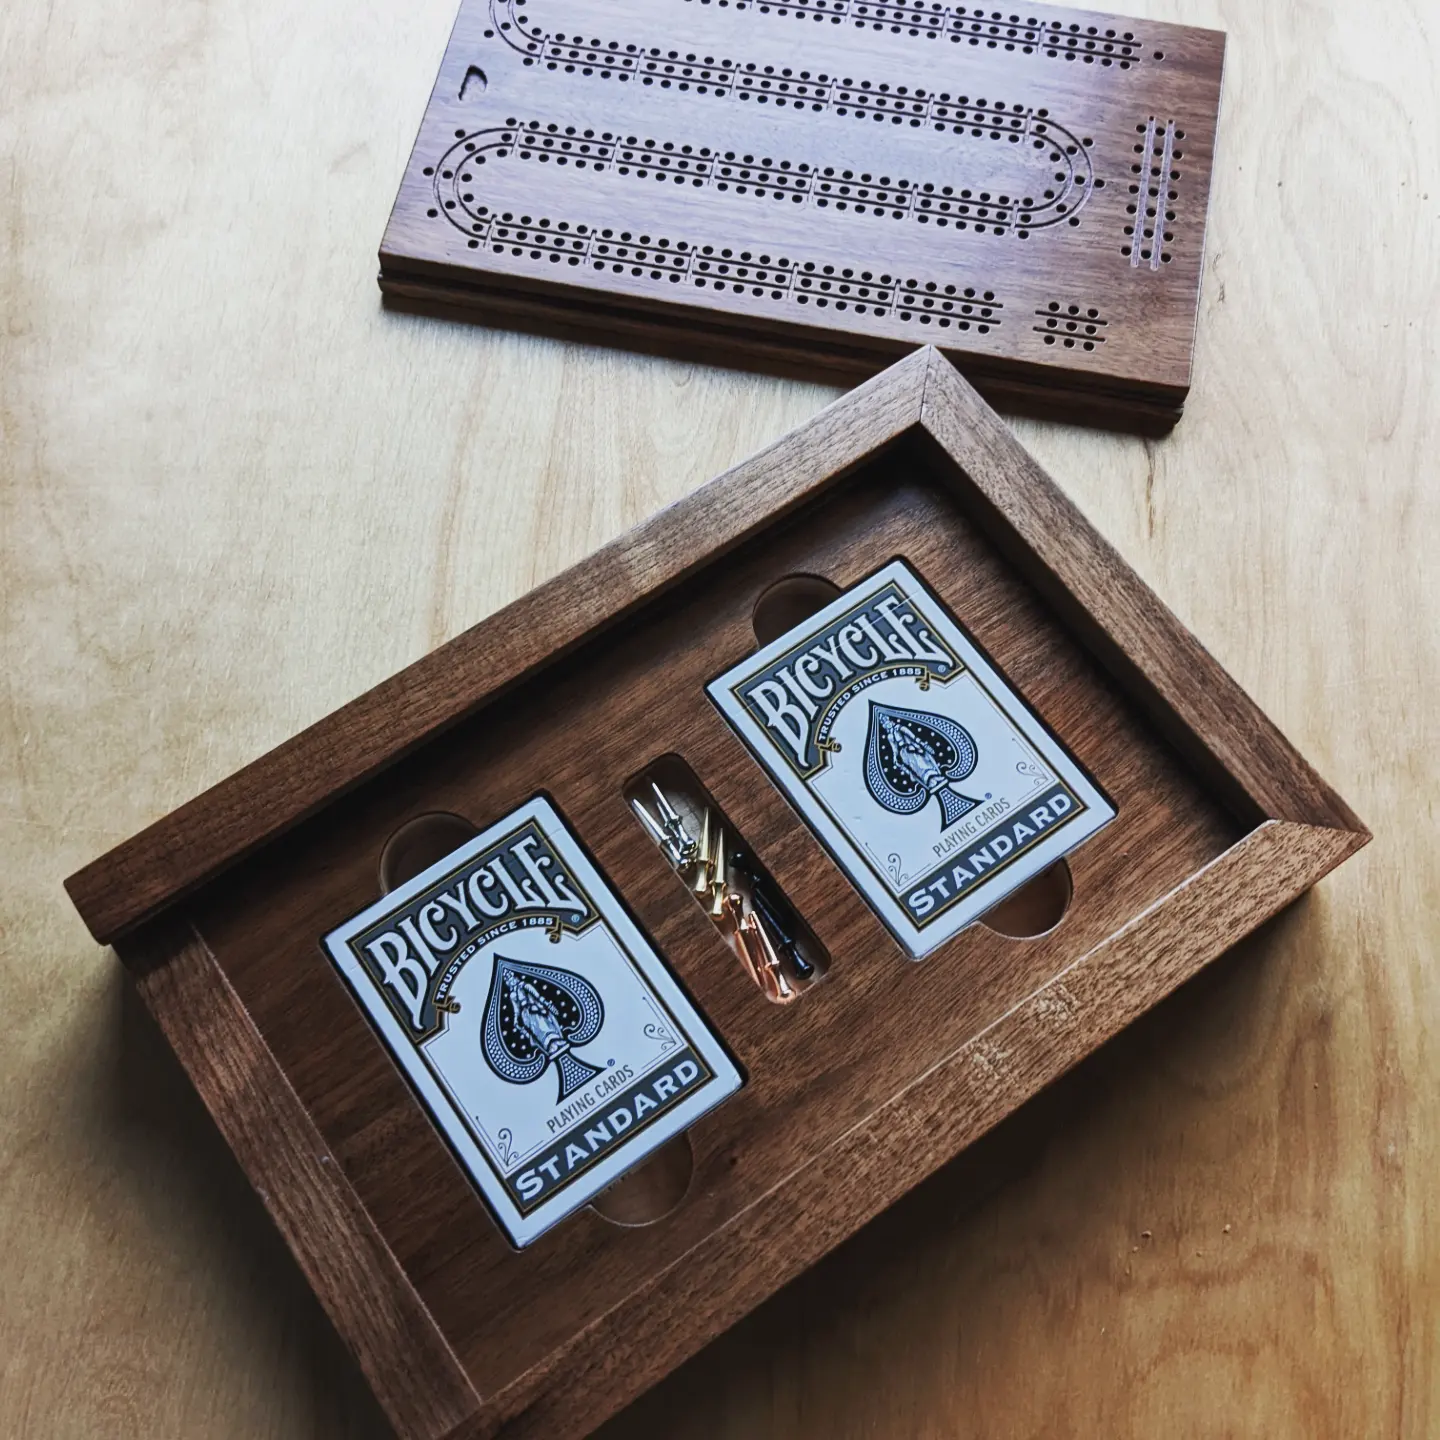
Did you know there are 391 holes in this thing?
Making sawdust
I had a limited supply of walnut and a short deadline, so I had one shot to really do it right. I ripped my stock to thickness, glued up a bookmatched panel, and set the CNC to work.
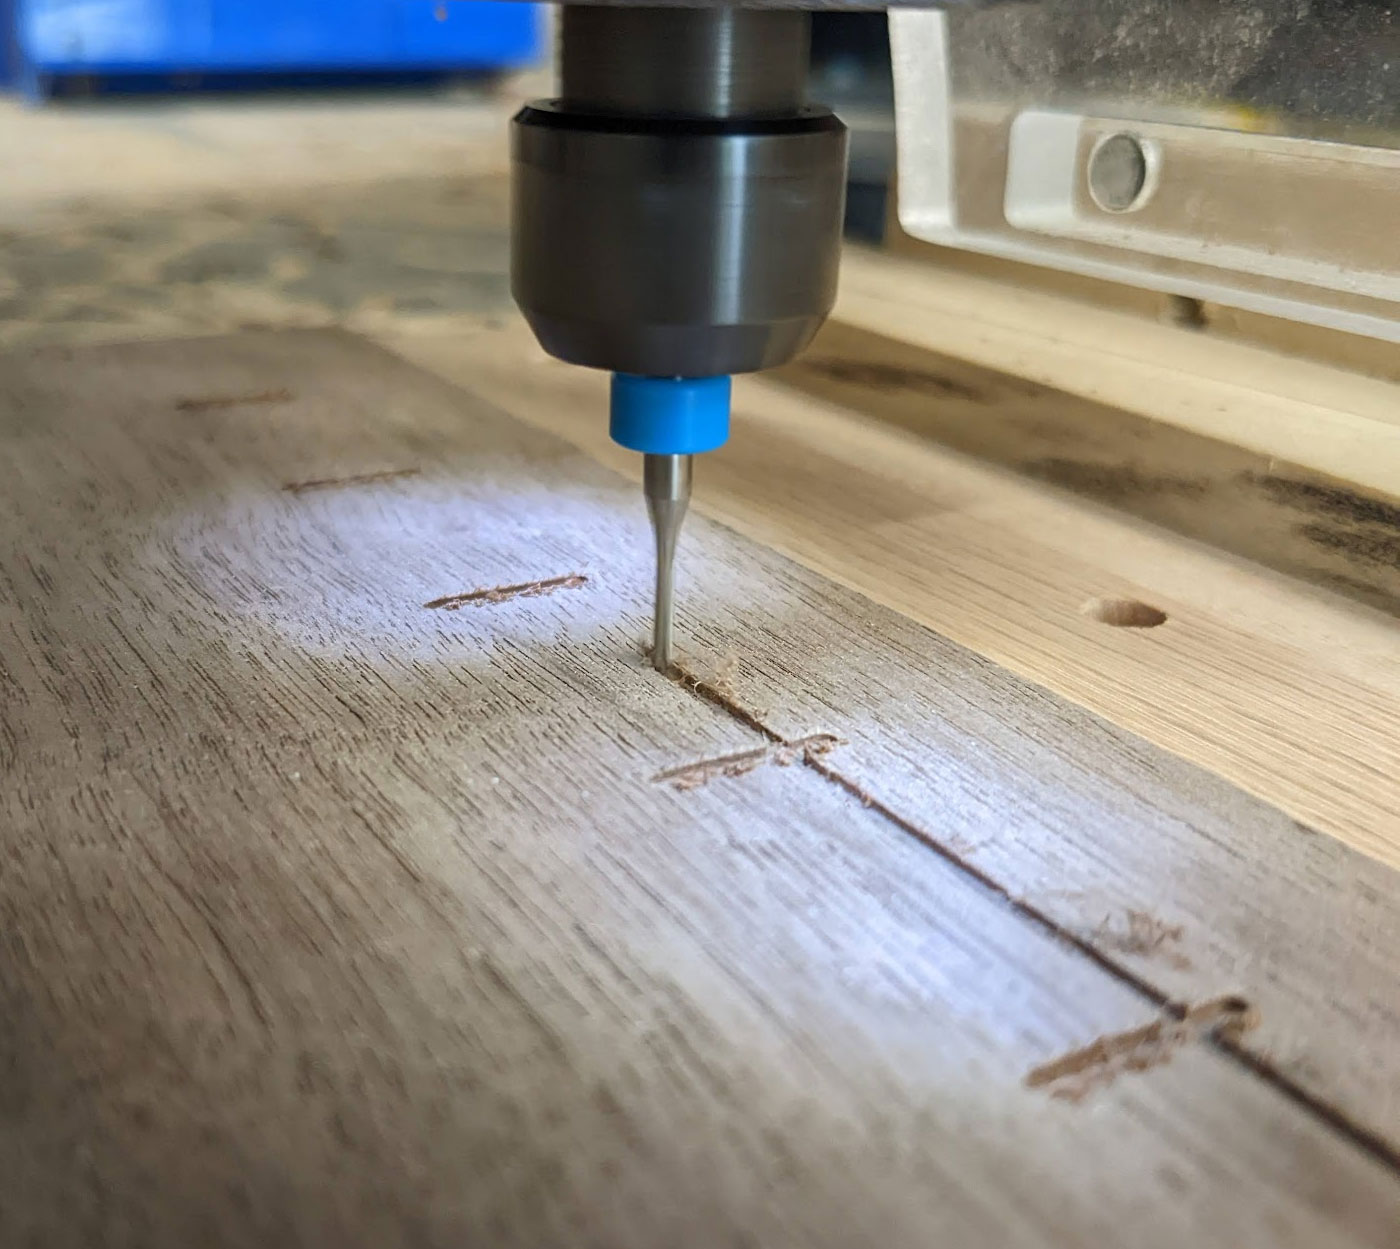

A CNC is typically a small router (if you haven't heard of a router, think of a drill that always points down) that is moved very precisely left/right, front/back, and up/down. It means you can create holes exactly where you want them, as deep as you want them. And you can cut down into your material, then move sideways to cut pockets and shapes. On this project I did both: cutting long, shallow curves, and drilling hundreds of holes in just the right spot.
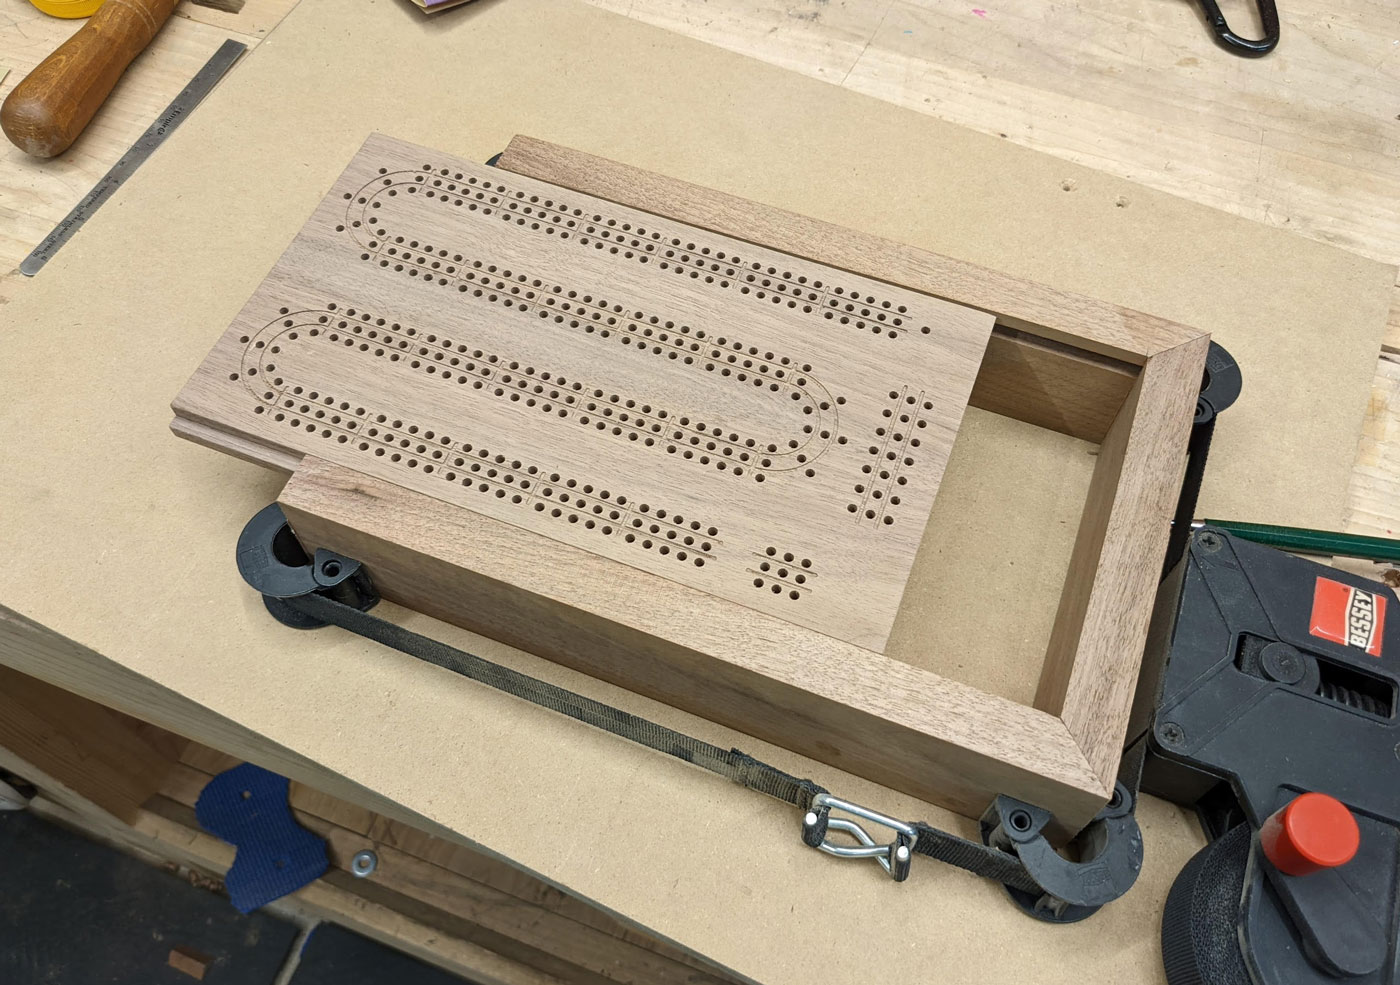
Making the box
Once I had the top out of the way, it was on to the relatively low-stress box. I laminated a thin piece of walnut on top of a thick maple base, which gives a strong color contrast, then cut pockets for two decks of cards and the pins. I set this up so that when the top was closed, the pins were locked into their pocket and couldn't escape. Compared to the top, this was the easy part.
Finishing
For small pieces, I almost always use a spray can lacquer. It's so quick and three or four light coats give great results.
The results!


This blog is an experiment: less about education and more about documenting the oddities I've experienced while building web apps.
My hope is that you're here because of a random search and you're experiencing something I've had to deal with.
Popular Posts
Recent Posts
- The magic of pair programming
- Migrating from Homebrew MySQL/Meilisearch/Redis to Laravel Herd Pro Services
- Fluently removing global scopes with Laravel's new ScopedBy Attribute
- Mapping a Hyper key on MacOS with Karabiner Elements (the easy way)
- Processing Shopify Webhooks with Laravel Queues